
Van telematics installation best practices guide

Getting telematics installed across your van fleet sounds straightforward until the first device fails to transmit, a wiring fault grounds out mid-route, or a driver raises a GDPR concern you hadn’t anticipated. Van telematics installation best practices exist precisely because the gap between a device being physically fitted and that device delivering reliable, compliant, actionable data is wider than most fleet managers expect. Done well, telematics transforms your operation, giving you real-time visibility, accurate driver behaviour records, and the compliance evidence your Operator Licence demands. Done poorly, it creates rework, data gaps, and legal exposure.
Table of Contents
- Establishing a clear installation rollout plan
- Choosing between OBD-II plug-in and hardwired installations
- Power and wiring best practices to avoid failures
- Post-installation commissioning and verification
- Ensuring UK data protection and compliance
- Integrating and validating telematics data for operational excellence
- Our perspective: the installation is the easy part
- See how Fleetalyse supports your telematics rollout
- Frequently asked questions
Key Takeaways
| Point | Details |
|---|---|
| Plan thoroughly | Scheduling and preparation weeks in advance significantly improve installation efficiency and success rates. |
| Choose installation method carefully | Select OBD-II plug-in or hardwired setups based on fleet size, vehicle type, and data needs. |
| Ensure wiring quality | Proper power-down, circuit identification, and cable routing prevent device failures and downtime. |
| Verify and document installs | Post-install checks and sending certificates promptly ensure insurance compliance and reliable data. |
| Maintain legal compliance | Follow UK GDPR requirements by documenting lawful basis and informing employees transparently. |
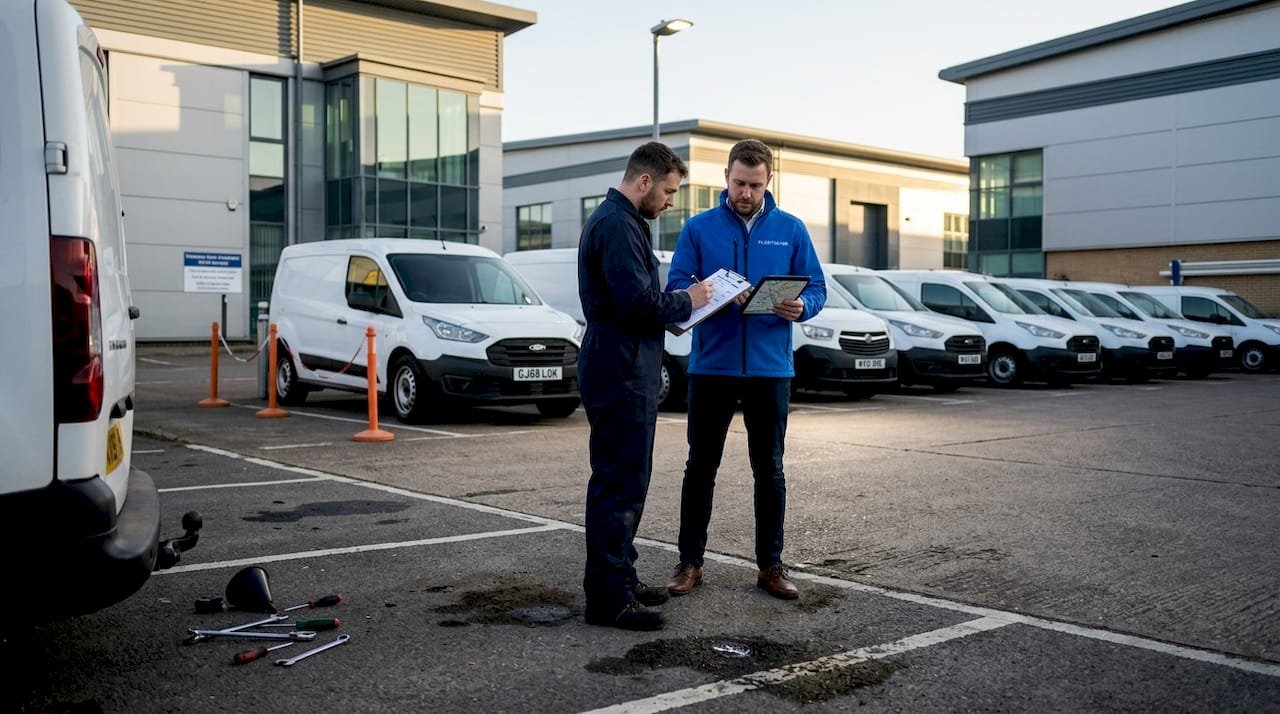
Establishing a clear installation rollout plan
The single most common reason telematics installations underperform is not hardware failure. It is the absence of a structured plan before a single device is fitted. Van telematics installation best practices start here, at the planning stage, before anyone picks up a tool.
A well-constructed rollout plan covers four core elements:
- Vehicle grouping — Categorise your fleet by vehicle type, age, and operational role. Vans used for last-mile delivery have different connectivity requirements than those running long-distance routes with tachograph obligations.
- Scheduling — Stagger installations to avoid taking too many vehicles off the road simultaneously. Group by depot or region to reduce technician travel time and keep disruption contained.
- Technician credentialing — Confirm that every engineer carrying out the work holds the appropriate qualifications. Certified technicians achieve first-time success rates close to 99%, compared with roughly 70% for uncredentialed fitters.
- Vehicle readiness checks — Confirm battery health, verify OBD-II port accessibility, and flag any pre-existing wiring faults before installation day.
For fleets exceeding 100 units, planning phases can span several weeks to avoid operational disruption and ensure certified technician deployment at every site. Rushing this stage to meet a contract deadline is the fastest route to a messy, expensive remediation project.
Co-ordinating with site managers matters too. Depots have their own protocols, shift patterns, and vehicle turnaround pressures. Booking installation slots in advance, confirming vehicle availability, and briefing site staff on what to expect all reduce the friction that derails even well-funded rollouts.
Key planning outputs to have ready before day one:
- A vehicle-by-vehicle installation schedule with confirmed time slots
- A technician allocation list matched to depot locations
- A pre-installation checklist covering battery condition, port access, and existing fault codes
- An escalation process for vehicles that fail readiness checks
Review your UK telematics compliance guidance early in the planning process. Compliance requirements shape which devices you need, how they must be configured, and what documentation you must retain.
With a solid plan established, next consider the methods of telematics connection suited to your vans.
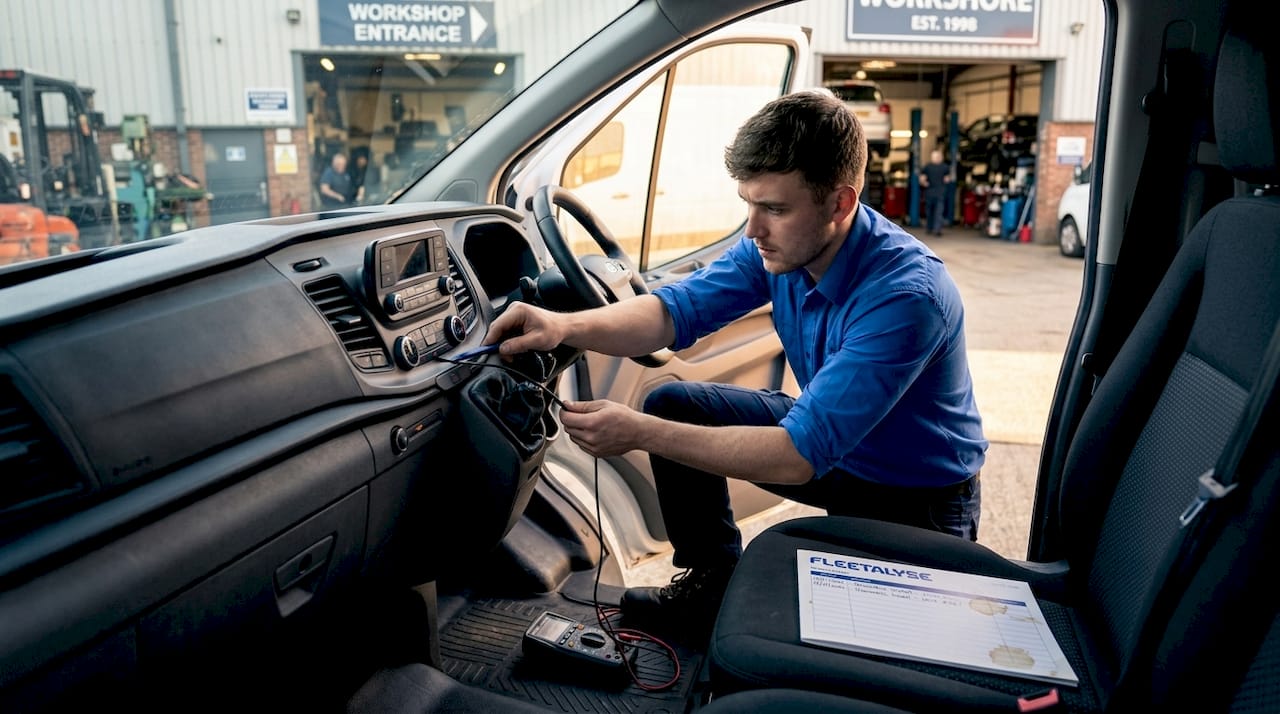
Choosing between OBD-II plug-in and hardwired installations
This is the decision that shapes everything downstream: data reliability, installation time, technician requirements, and long-term maintenance burden. Neither option is universally superior. The right choice depends on your fleet’s operational profile and data requirements.
OBD-II plug-in installations
- Fit directly into the vehicle’s OBD-II port, typically located under the dashboard
- Take 10 to 20 minutes with no specialist tools required
- Suitable for fleets needing rapid deployment or short-term tracking
- Vulnerable to accidental disconnection by drivers or during vehicle servicing
- May have limited access to CAN-bus data on older van models
Hardwired installations
- Connect directly to the vehicle’s electrical system via ignition-switched and constant power circuits
- Take 45 to 90 minutes and require a qualified auto-electrician
- Provide stable, uninterrupted power and broader data access including CAN-bus signals
- Preferred where multiple peripherals are connected, such as cameras, temperature sensors, or driver ID readers
- Less susceptible to tampering or accidental removal
| Feature | OBD-II plug-in | Hardwired |
|---|---|---|
| Installation time | 10 to 20 minutes | 45 to 90 minutes |
| Tools required | None | Multimeter, wiring tools |
| Data access | Basic to moderate | Full CAN-bus access |
| Tamper resistance | Low | High |
| Best suited for | Small fleets, rapid deployment | Complex device arrays, long-term use |
Pro Tip: If your vans carry refrigerated goods or require camera integration, hardwired is the only realistic option. The additional installation time pays for itself within weeks through data quality alone.
Browse the available telematics hardware options to match device capability to your installation method before committing to either approach.
Having selected the installation method, focus next on power and wiring best practices essential for reliability.
Power and wiring best practices to avoid failures
Poor wiring is responsible for 5 to 10% of early device failures across fleet telematics installations, each one requiring a return visit, lost vehicle time, and avoidable cost. The good news is that virtually all of these failures are preventable with disciplined installation technique.
Follow this sequence for every hardwired installation:
- Disconnect the battery before beginning any wiring work. Follow your organisation’s lockout procedure to prevent accidental reconnection during the install.
- Use a multimeter to identify the correct circuits: a constant 12V supply for device memory, an ignition-switched circuit to trigger device activation, and a clean chassis ground point.
- Route cables behind trim panels wherever possible. Cables left exposed under dashboards are vulnerable to heat, abrasion, and interference from cleaning equipment.
- Protect wiring runs with split loom conduit or self-amalgamating tape at any point where cables pass through bulkheads or near moving components.
- Secure all connections with appropriate terminals. Avoid twisted-and-taped joins, which corrode and fail under vibration.
- Reconnect the battery and test before closing up any trim. Confirm the device powers on with ignition and enters sleep mode with ignition off.
Pro Tip: Always use the ignition-switched circuit rather than a constant live for the device’s primary power trigger. Devices drawing constant power when the van is parked will flatten batteries over a long weekend, generating driver complaints and potentially stranding vehicles.
Correct identification of circuits with a multimeter and careful cable routing behind trim protects hardware and reduces the rework that poor wiring causes. Reviewing UK vehicle wiring standards before installation ensures your technicians are working to the correct specification.
Once installation hardware and wiring are in place, the next critical step is commissioning and verification to ensure operational success.
Post-installation commissioning and verification
Fitting the device is not the finish line. A telematics unit that is physically installed but not properly commissioned is, from an operational standpoint, useless. Worse, if your insurance policy requires a Thatcham-approved tracker, an unverified installation may invalidate your cover.
Every installation should complete the following before the van returns to service:
- Confirm tracker activation with your control centre or platform provider. The device must be transmitting GPS position and ignition status correctly before sign-off.
- Validate data flow by taking the vehicle on a short test drive and checking that journey data appears accurately on the platform dashboard.
- Register driver recognition tokens or driver ID cards if your system uses them. A device that cannot attribute journeys to individual drivers defeats the purpose of behaviour monitoring.
- Configure geofences for key locations such as depots, customer sites, or restricted zones, so the system begins generating actionable alerts immediately.
- Send the Thatcham installation certificate to your insurer the same day. After installation, the engineer must confirm tracker activation with the control centre and send the certificate to the insurer to meet policy requirements. Delays here are a common and entirely avoidable compliance gap.
Maintaining a commissioning log for each vehicle, recording activation confirmation, test drive results, and certificate dispatch, gives you an auditable record that satisfies both insurer and telematics compliance procedures under your Operator Licence.
Beyond installation, compliance with UK data protection laws ensures lawful and transparent telematics use.
Ensuring UK data protection and compliance
Installing a GPS tracker in a company van without the correct legal framework in place is not a grey area. Under the UK GDPR and the Data Protection Act 2018, continuous vehicle monitoring constitutes processing of personal data, and you need a documented lawful basis before you begin.
Vehicle tracking requires a documented lawful basis, commonly legitimate interests with a balancing test, plus clear employee communication to meet UK GDPR. In practice, this means:
- Documenting your legitimate interests assessment to show that your business need for tracking (route efficiency, theft recovery, compliance evidence) is proportionate and does not override employees’ right to privacy.
- Informing employees clearly and in writing about what data is collected, how long it is retained, who can access it, and whether it may be used in disciplinary proceedings.
- Conducting a Data Protection Impact Assessment (DPIA) for any monitoring setup that is continuous or covers personal journeys outside working hours.
- Restricting data access to those with a genuine operational need. A depot coordinator does not need access to the same data as a compliance officer.
- Reviewing monitoring intensity regularly. If your operation changes, your data protection assessment should be updated to reflect it.
One practical point many fleet managers overlook: if you use telematics data in a disciplinary hearing, the process by which that data was collected and disclosed must itself be compliant. Procedural failures at this stage can undermine otherwise straightforward cases.
Alongside compliance, integration best practices ensure telematics data drives operational efficiency.
Integrating and validating telematics data for operational excellence
The final piece of optimising van telematics setup is ensuring the data your devices generate is accurate, trusted, and actually used by the people who need it. Hardware that works perfectly but feeds into a poorly maintained platform delivers a fraction of its potential value.
Best practices for van fleet management solutions at the integration stage include:
- Standardising fleet records before installation. Vehicle registration numbers, asset IDs, and driver assignments should be clean and consistent in your platform before a single device is activated.
- Running a pilot group first. A structured rollout with pilot groups verifies hardware reliability and data accuracy before full deployment. Ten vehicles across two depots will surface most configuration issues without risking your entire fleet’s data quality.
- Validating GPS and engine data against manual checks during the pilot. If the platform reports a journey as 47 miles but the driver’s record shows 52, investigate before rolling out to 200 vans.
- Training operations and maintenance teams on how to interpret alerts, use the dashboard, and act on the data. Technology that nobody understands does not change behaviour.
- Implementing ongoing audits to track key performance indicators over time.
| KPI | What to measure | Review frequency |
|---|---|---|
| Data uptime | Percentage of vehicles transmitting | Weekly |
| PM compliance | Scheduled maintenance completed on time | Monthly |
| Driver behaviour score | Harsh braking, speeding, idling | Weekly |
| Data integrity | Journey records matching manual logs | Monthly |
Cleaning fleet records and team training is essential for ongoing telematics success, and the fleets that treat integration as a continuous process rather than a one-time event consistently outperform those that treat go-live as the end of the project.
Review your telematics operational integration approach regularly to ensure the platform continues to serve your evolving operational needs.
Our perspective: the installation is the easy part
Here is something the telematics industry does not say loudly enough: fitting the hardware is genuinely the simplest part of the process. A competent auto-electrician can hardwire a device in under an hour. What takes months to get right is everything around it.
The fleets that extract real value from telematics are not the ones with the most sophisticated hardware. They are the ones that invested time in the planning, the compliance framework, the staff communication, and the data governance before the first device was ever fitted. We have seen fleets with entry-level plug-in devices outperform competitors running high-specification hardwired units, simply because their rollout was disciplined and their teams actually understood how to use the data.
The uncomfortable truth is that most telematics underperformance is a management problem, not a technology problem. Devices do not fail to deliver insight because they are poorly engineered. They fail because nobody validated the data, nobody trained the dispatcher, and nobody told the drivers why the system was there in the first place. Driver buy-in, which is rarely mentioned in installation guides, is one of the strongest predictors of whether telematics data leads to genuine behaviour change.
Our advice: treat installation day as the start of the project, not the end of it.
See how Fleetalyse supports your telematics rollout
If you are planning a telematics installation across your van fleet and want to avoid the common pitfalls outlined above, Fleetalyse is built to support exactly this kind of rollout. Our platform combines GPS vehicle tracking, driver behaviour monitoring, and automated compliance tools in one place, with UK-based support available throughout your installation and beyond.
From plug-and-play telematics units to full tachograph integration for mixed fleets, we provide the hardware, the platform, and the expertise to ensure your installation delivers reliable data from day one. Our team understands the DVSA requirements, Operator Licence obligations, and UK GDPR framework that shape compliant telematics use. Whether you are fitting ten vans or five hundred, Fleetalyse gives you the visibility and confidence to run a compliant, efficient fleet.
Frequently asked questions
How long does a typical telematics installation take on vans?
Plug-in OBD-II installs typically take 10 to 20 minutes without tools, while hardwired installations take around 45 to 90 minutes due to the wiring complexity involved.
Why is post-installation verification critical for fleet telematics?
Verifying activation and data transmission ensures devices report accurately from the outset, preventing the data gaps and rework that cause unnecessary downtime and cost.
What data protection rules apply to telematics in UK fleets?
Vehicle tracking under UK GDPR requires a documented lawful basis, typically legitimate interests, combined with clear employee notification and proportionate data handling practices.
How can fleets ensure telematics data is reliable and actionable?
Run a structured pilot rollout to validate hardware and data accuracy before full deployment, standardise vehicle records, and train staff on the workflows tied to telematics alerts.
What common wiring mistakes should be avoided in telematics installations?
Avoid unsecured wiring, improper circuit connections, and devices drawing constant power when parked, as poor wiring causes 5 to 10% of early device failures and leads to costly rework visits.